Monday, April 30, 2012

Family Room Art & How To Add Grommets!

{If you didn't hear, The Real Housewives of Bucks County are now East Coast Creative (Get the story here). You'll still be getting all the DIY, Design, and Monica & Jess that you love, but change your favorites to www.eastcoastcreativeblog.com  Thanks!}  


You might remember that one of my 2012 goals was to make our family room reflect my style more this year.  I still am convinced I don't really have a style... I more or less, just take lots of things I like and smush them all together, hoping it works out okay.  Recently, I took one more step in the right direction for the room.  


I was browsing on Etsy a few weeks back and came across a shop I loved! Project Type has so many graphic art prints that I immediately fell in love with.  This one in particular caught my eye.  


I had been toying around with the idea of vintage cameras in our family room and this picture was too cool to pass up.  I contacted the artist to see if I could have a few custom tweaks made (it was vertical and I needed horizontal) and she said YES!  I was so stinkin' excited when she agreed! 

I ordered two prints and honestly even the packaging they came in was super cool!  Now, you might remember what was on the wall already.  My ginormous family picture with the smaller frame... 

Ginormous
Well this time, I was going for the reverse.  Tricky aren't I?  Bigger frame smaller picture.  

Once again I used my prized possession, AKA grommeter from Nate.  I'll admit I was a tad nervous putting holes in fabulous artwork, but I wanted it to have the same feel as the large print.  

Want to know how to use a Grommeter??
Add Grommets

I keep my grommet tools in the little bin Nate gave me.  Who knew one could love Tupperware? 
IMG_0545
Take one of the female grommets and determine your placement.  I traced it with a pencil (a very fancy pencil I might add!)
IMG_0548
Next place the cutting tool (might have an official name, but I don't know it) on your traced circle, and put the mini block of wood under it.  The wood comes with your kit.  
IMG_0553
Give it a solid pounding with a hammer and you have a nice little circle cut-out
IMG_0554
Pop the male piece through the opening. Make sure the pointy end is on the back of your artwork. 
IMG_0555
Now start stacking.  Add the female part to the back...
IMG_0559
Here' the order...
The large metal ring goes on the bottom (part of the tool kit), then the male grommet, then paper, then female grommet, then the big mama tool (that's the really official term).  Now Hammer, Hammer, Hammer.  (Don't do it on your granite counter.  I took mine outside in the garage) 


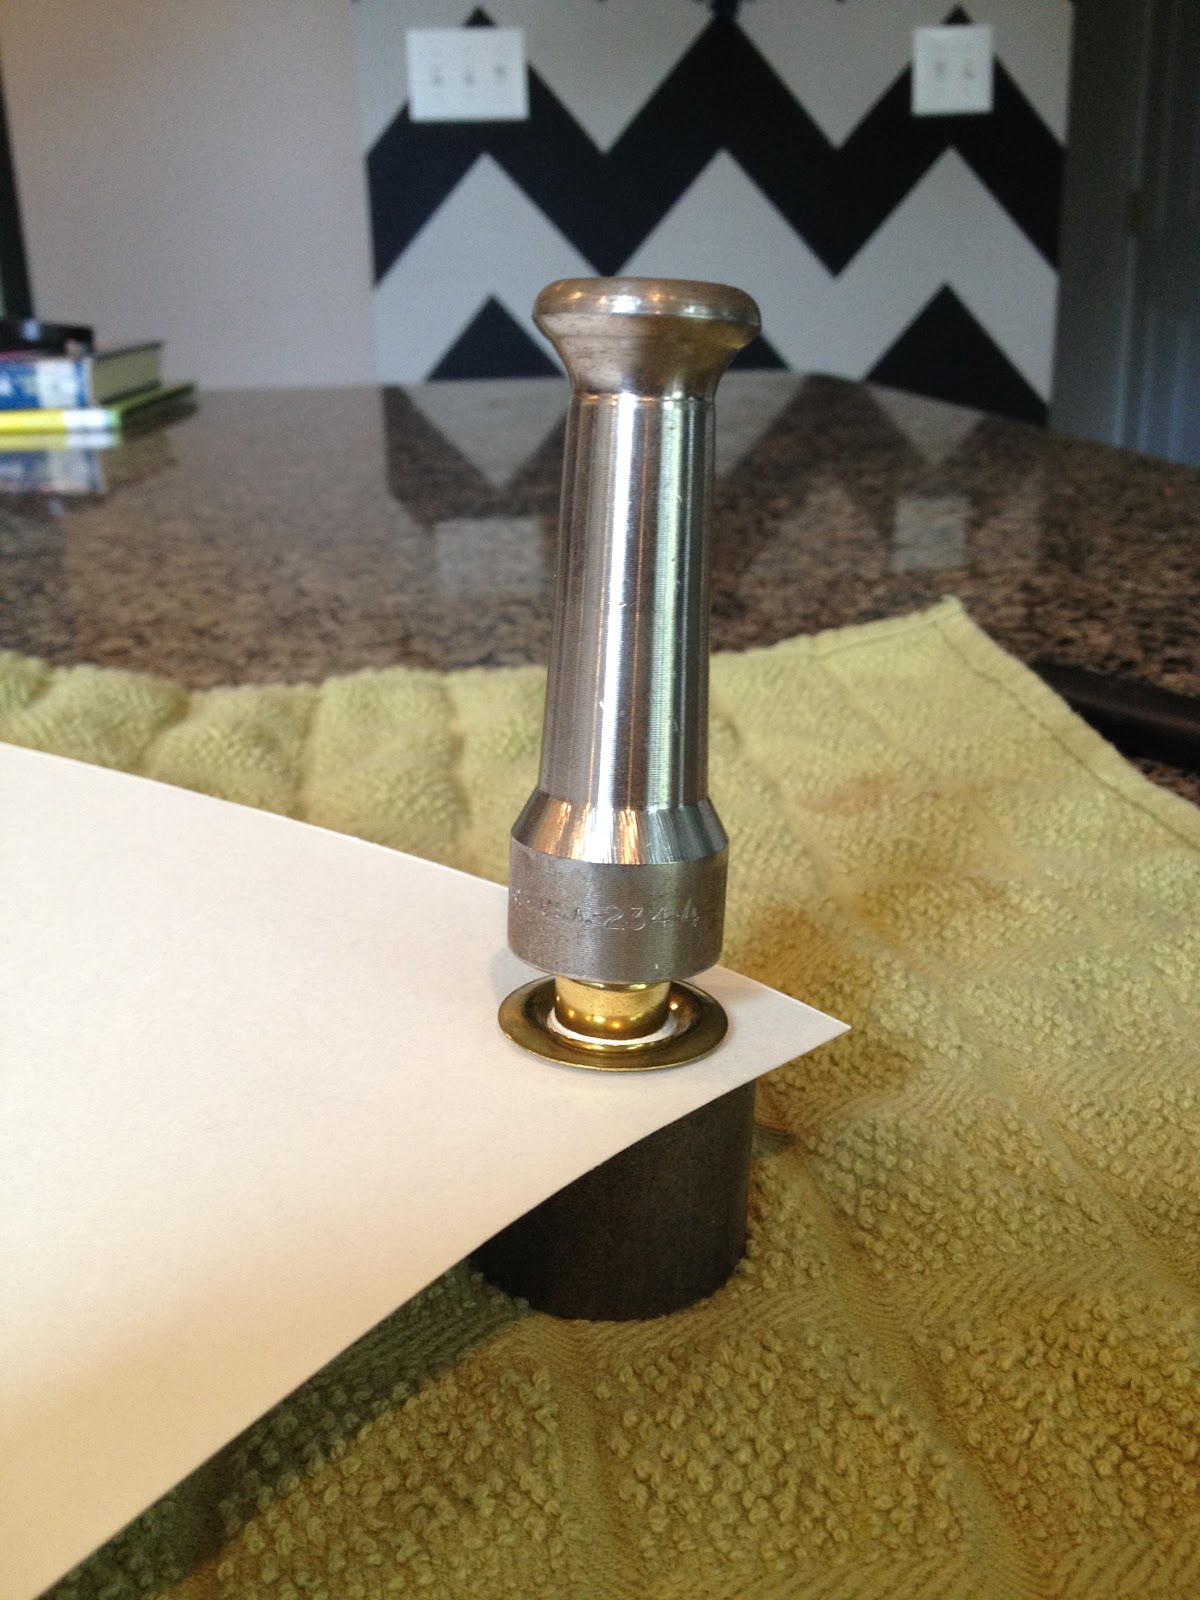
Ta-da! Perfectly adorable grommet! 
IMG_0560
I took my art to the wall and hung it with plain nails.  I'll use decorative ones to cover 'em up.  
IMG_0565
I added my chain, which again only cost me about $1.45 at Lowes
IMG_0566
And vioila! I'm also going to add a fun door nob to the peak of the chain.  I didn't quite get to Architectural Antiques this weekend as I planned to.  
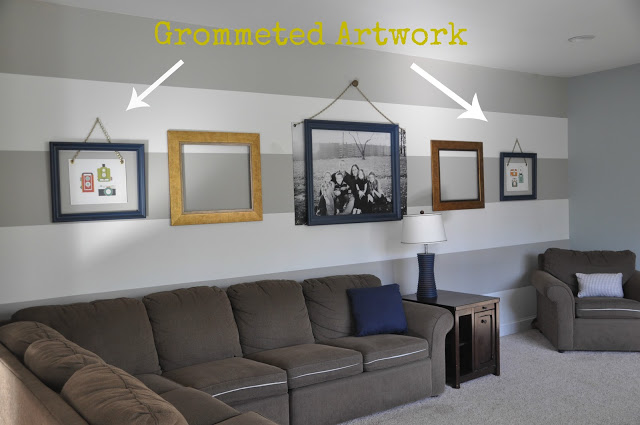
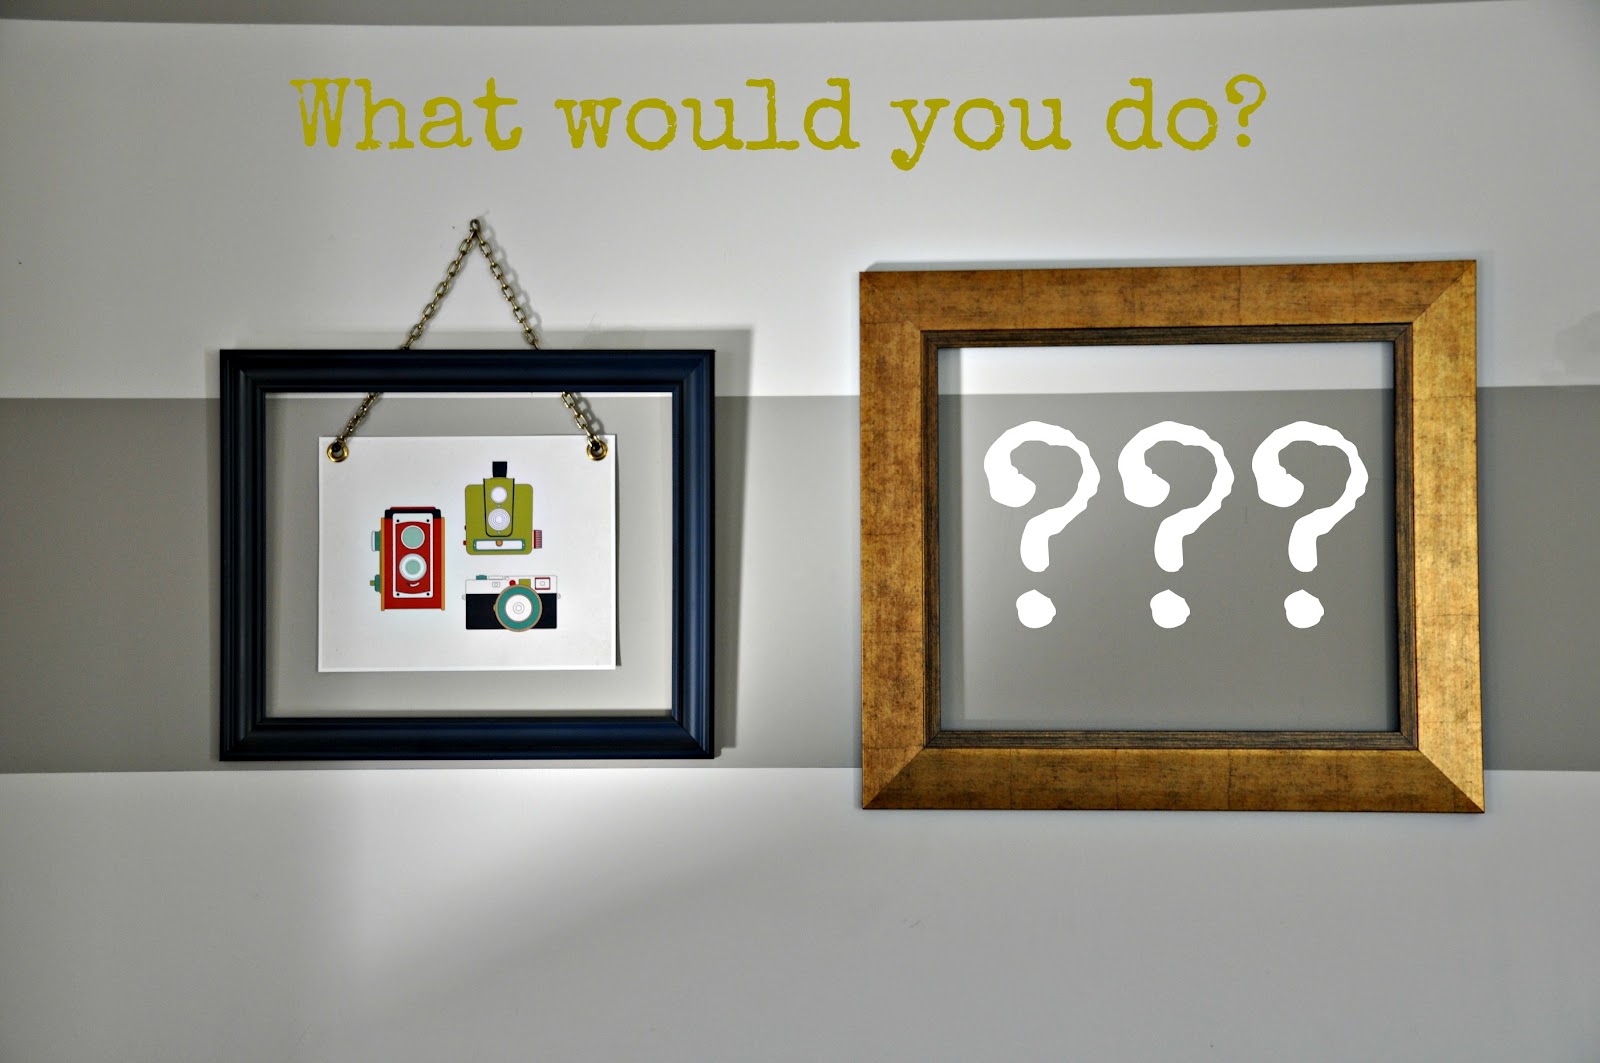
Now, here's the question of the day...  What should I put in the open gold frames??
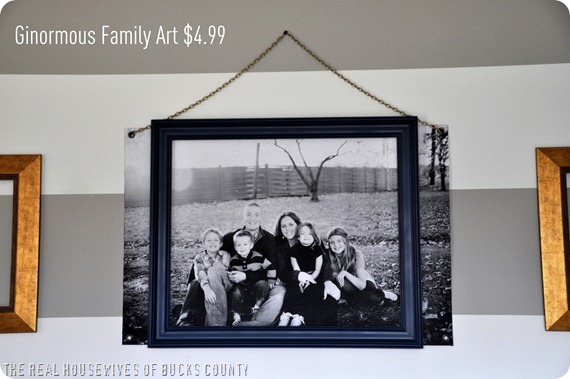
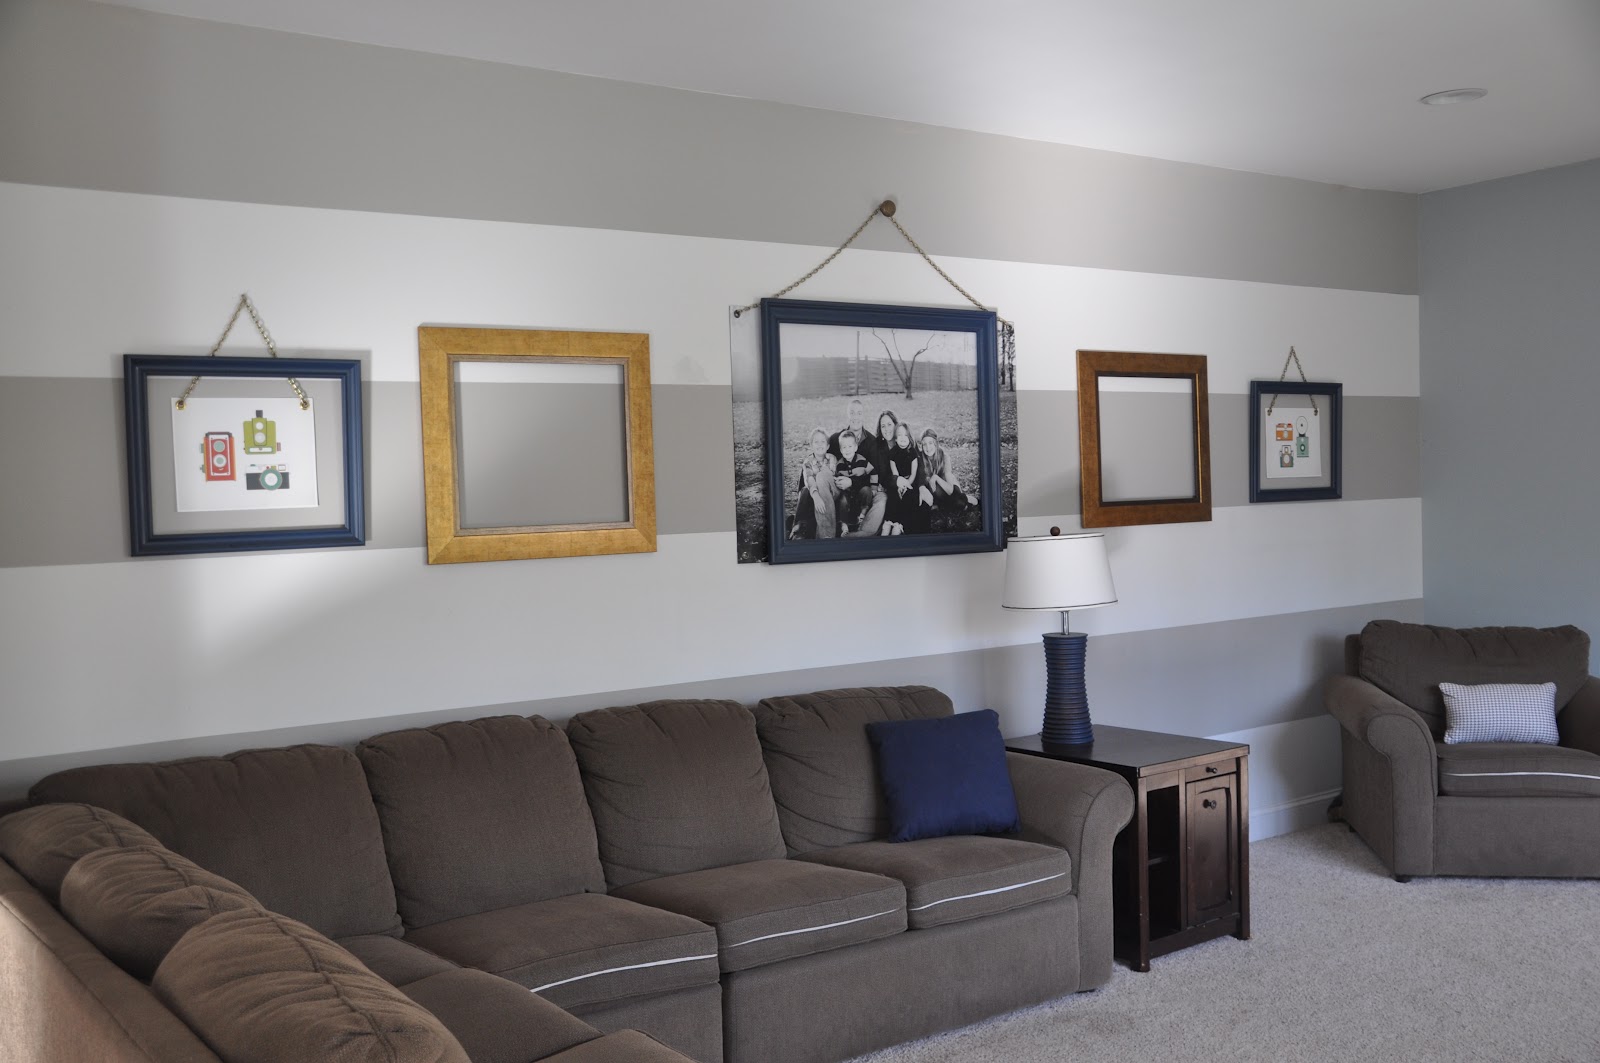
Here's the room to give you the full picture...
Side note:  Does anyone else have a weird husband that flips the cushions backwards?  He does it when we don't have company over because the kids make a mess of the cushions. Sometimes I forget and then it's an awkward, mad rush as people are walking in the door.  Weird. I know.  

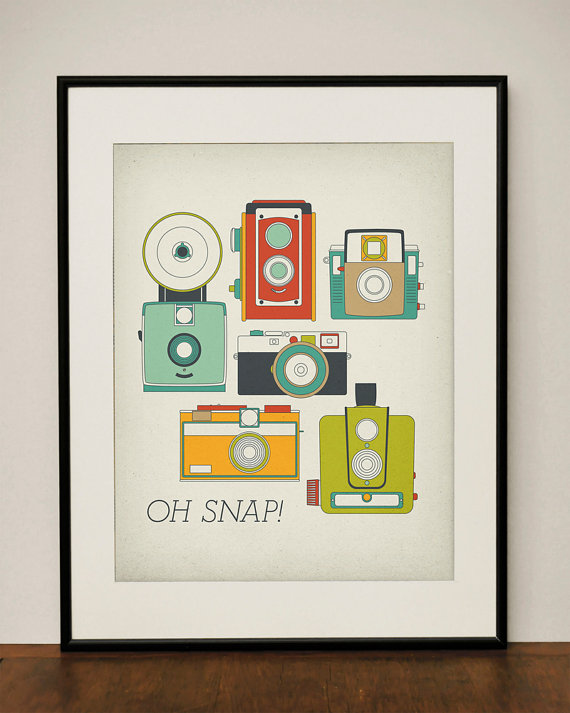
So let me know what you think of my retro camera art, and what I should do to finish off this wall!  


Monica
Follow Me on Pinterest 
 

8 comments:

  1. Love this tutorial. I just bought the supplies to make grommets with some window treatments. I was thinking I was just going to return it all,but after seeing your post on using it for artwork... i might just hold on to all of it. thanks
    laura@imnotatrophwife.com

    ReplyDelete
  2. I would put a small shelf inside the gold frames and put antique cameras on the shelf.

    ReplyDelete
  3. This is so cool! I love that you did a smaller frame over a larger print- makes it so much more interesting!

    ReplyDelete
  4. I have never seen this before, it turned out beautiful, how cool!!!!

    ReplyDelete
  5. Love the idea, great job ladies! Question though, did you print the images on a heavier weight or special paper for the grommets to work?

    Keep up the awesome work; I always love seeing what you do and how you inspire us :-)

    ReplyDelete
  6. i would have made those the middle, make family,vintage cameras,family,vintage cameras,and family. ang

    ReplyDelete
    Replies
    1. oh and add a vintage camera the the end table.ang

      Delete

We love hearing from our readers! Feel free to let us know what you think or ask a question! Make sure the block replies is NOT checked, so that we can write back. We definitely will.

Related Posts Plugin for WordPress, Blogger...